
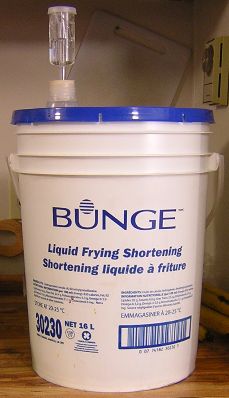
A couple of weeks ago I picked up one of those cans of beer mix at the grocery store on sale. I’ve made fruit wine a few times already using nothing but water, fruit, sugar and yeast. I’ve been pleased every time except once with the wine, so I figured a pre-made beer kit would be dead easy. In typical SmartLikeTruck fashion I couldn’t keep myself from altering the process a little. The recipe calls for a 23 liter bucket to mix and ferment in, I only had an empty 16 liter bucket available, and I figured since I favor a slightly darker amber beer over the usual pale yellow stuff, I’ll try the mix a little thicker than standard. Other than using 6 to 7 liters less water, I’m following the directions pretty closely.
 Over the last 4 days I watched the bubbling of the airlock slow to the point where I’d get bored and walk away before a bubble happened so I figured it was time to bottle it.
A quick tip brewing anything on the cheap, if you get your hands on some food grade buckets with the pop out pour spout. The corks that come in the glass carboy kits fit perfect in the spout mouth. Therefore no digging out the holesaw to make the right sized hole.
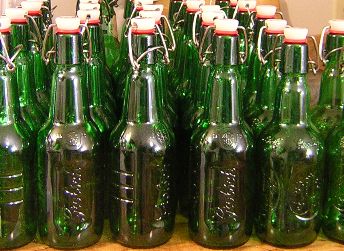 To prep for bottling I went out and got my empty Grolsch flip top bottles from the shed. I consider these bottles to be a godsend for home brewing of wine and beer, you don’t need a corker or capper hanging around and of course you don’t need to buy corks and caps. These bottles were soaked in a pretty strong household bleach and hot water bath for about half an hour per sink full of bottles. After a good soak the labels peeled off pretty easy and the last of the label adhesive came off with a quick wipe with a nylon pot scrubbie. The bottles were then triple rinsed with scalding hot tap water. (our water heater is set way too high, but it works great for things like this)
Once all the bottles were prepped, the next step was to add a level half teaspoon of sugar to each bottle. The sugar will be fermented in the bottle and naturally carbonate the beer.
For transferring the beer to the bottles I just used a 5 foot length of clear pvc hose with a couple of spoons twist tied to the end to keep the siphon from sucking up the lees (yeasty muck at the bottom of the pail). I set the pail next to the sink on top of another container, so that the pail bottom was about 10 inches above the top edge of the sink, it makes the siphoning so much easier.
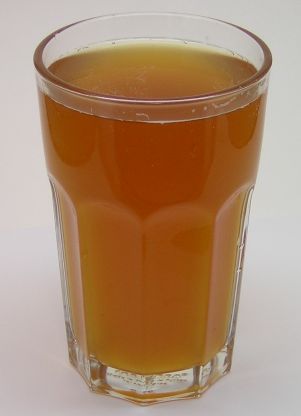
During the bottling, 5 or 6 pints of beer was consumed, mandatory sampling for quality assurance dontcha know. The beer was just a little colder than room temp and had next to nothing for fizz but the flavor was awesome, pretty damn close to exactly what I wanted.
From this point what could possibly go wrong? If too much sugar was added to the bottles, or if the brew wasn’t fermented enough I could be facing a batch of randomly exploding glass shrapnel beer grenades. So for the next week or so the beers will stay in boxes stowed in a commercial grade barrel liner (extra heavy duty garbage bag).
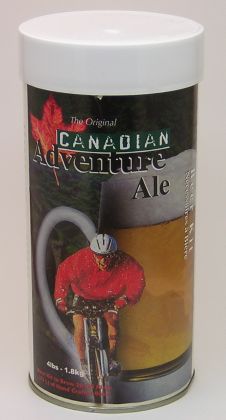 This picture is of the kit that I used. It’s Canadian Adventure Ale from Danmar Wine and Beer Supplies.
I’ll update after the first tasting in a week or so. If bottles start exploding, I may update sooner.
Update:
I’ve got 2 things I’ll do different with the next batch, both involve the sugar amounts.
When bottling the beer I added 1/2 teaspoon of sugar to the bottles for carbonation, but this is for normal 350ml bottles. The Grolsch bottles are 450ml and 473ml, so this batch of bottles are a little flat.
The other change with sugar will be less added for initial fermentation, this batch of beer is damn strong, like Colt 45 malt liquor strong. So the next batch the sugar for initial fermentation will be reduced to closer in ratio with the reduced water. I may purchase a hydrometer just to see how strong it really is.
So in closing this experiment was not a total success, but I did end up with a batch of palatable hootch so not a total disaster either.
2 Comments
Leave a reply →